Singular Tracking
此内容尚不支持你的语言。
1. Setting Up An Install Postback
To add an AppLovin postback in Singular, you need your SDK Key from the AppLovin dashboard under Accounts > Keys or from your AppLovin account manager.
- Navigate to Partner Configuration.
- Search for and select AppLovin.
- Select your App.
- Make sure that Send postbacks to AppLovin on all installs is checked.
- Enter your AppLovin SDK Key.
- Set Click-through attribution lookback window to 7 days (7d).
![]()
2. Setting Up View-Based Attribution
- Navigate to the Partner Configuration section (as described in the first few steps of section 1).
- Make sure that Enable View-through Postbacks is checked.
3. Generating Tracking URLs
-
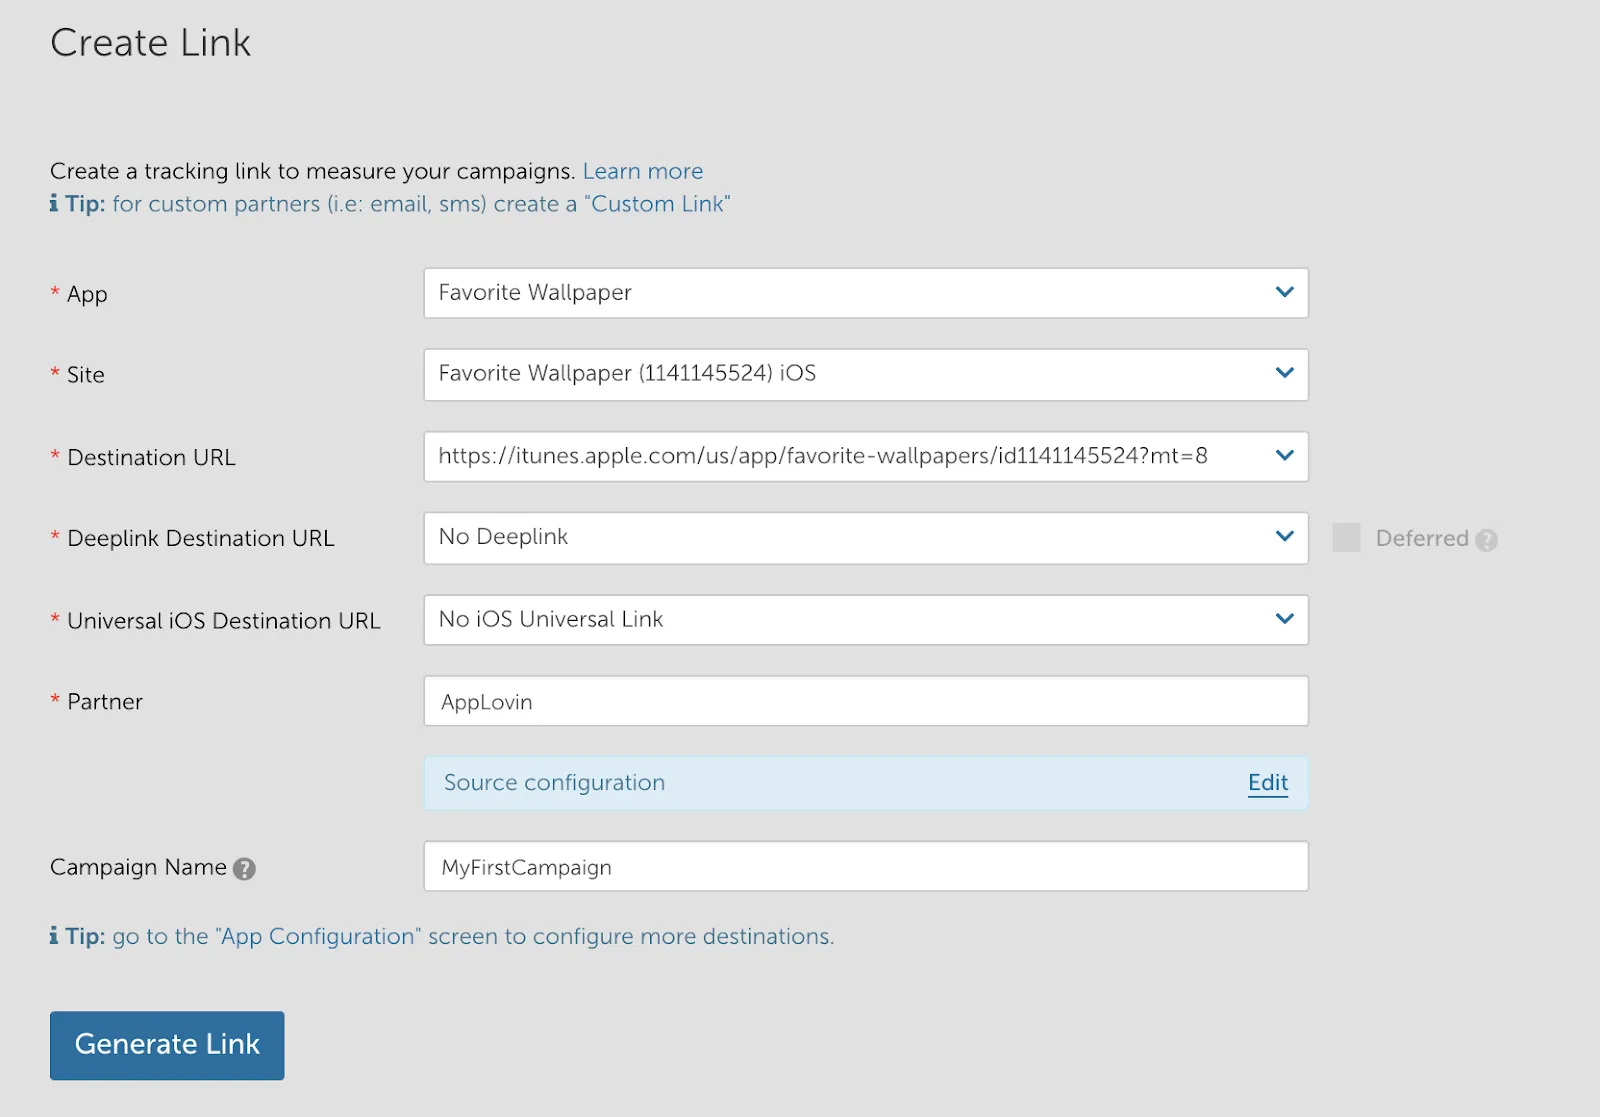
Navigate to Create Link.
-
Enter the required information on which app the link should be for.
-
Select AppLovin in the Partner option
-
Click Generate Link.

If you want to add custom parameters, refer to this list of AppLovin’s click macros.
4. Adding In-App Event Postbacks
- Navigate to the Partner Configuration section (as described in the first few steps of section 1).
- Map the In-app (SDK) event name to the appropriate AppLovin Event Name value:
- App Opens (__SESSION__) → AppLovin Event Name: “landing”
- Revenue Events → AppLovin Event Name: “checkout” (check the Send revenue box)
- All Other Events → AppLovin Event Name: “postinstall”
5. Setting the Minimum Session Interval
Set the session interval to the lowest possible value to optimize the outcome of your campaigns. You may edit the minimum session interval setting on your App Configuration page in your Singular dashboard (Settings > Apps), or ask for support from your Singular representative.