Direct Sold
Esta página aún no está disponible en tu idioma.
You can set up direct sold campaigns to compete against your network demand partners in a unified real-time auction.
Creating a Direct Sold Campaign
Take the following steps to create a direct sold campaign:
-
Select MAX > Mediation > Manage > Direct Sold in your MAX dashboard. This opens the Campaign Management page.
-
Click + Create Campaign.

-
The New Campaign: Basic Info page opens. Enter your campaign details:
Order: Create or select a new order for the campaign. Orders are a way you can organize and group direct sold campaigns.
Campaign Name: Give your campaign a name.
Select Ad Units: Choose the OS for the ad units you want to target in the campaign. For each OS, you can open a drop down checklist of the apps and ad units you can target. Check the checkboxes next to those apps or ad units you want to target.
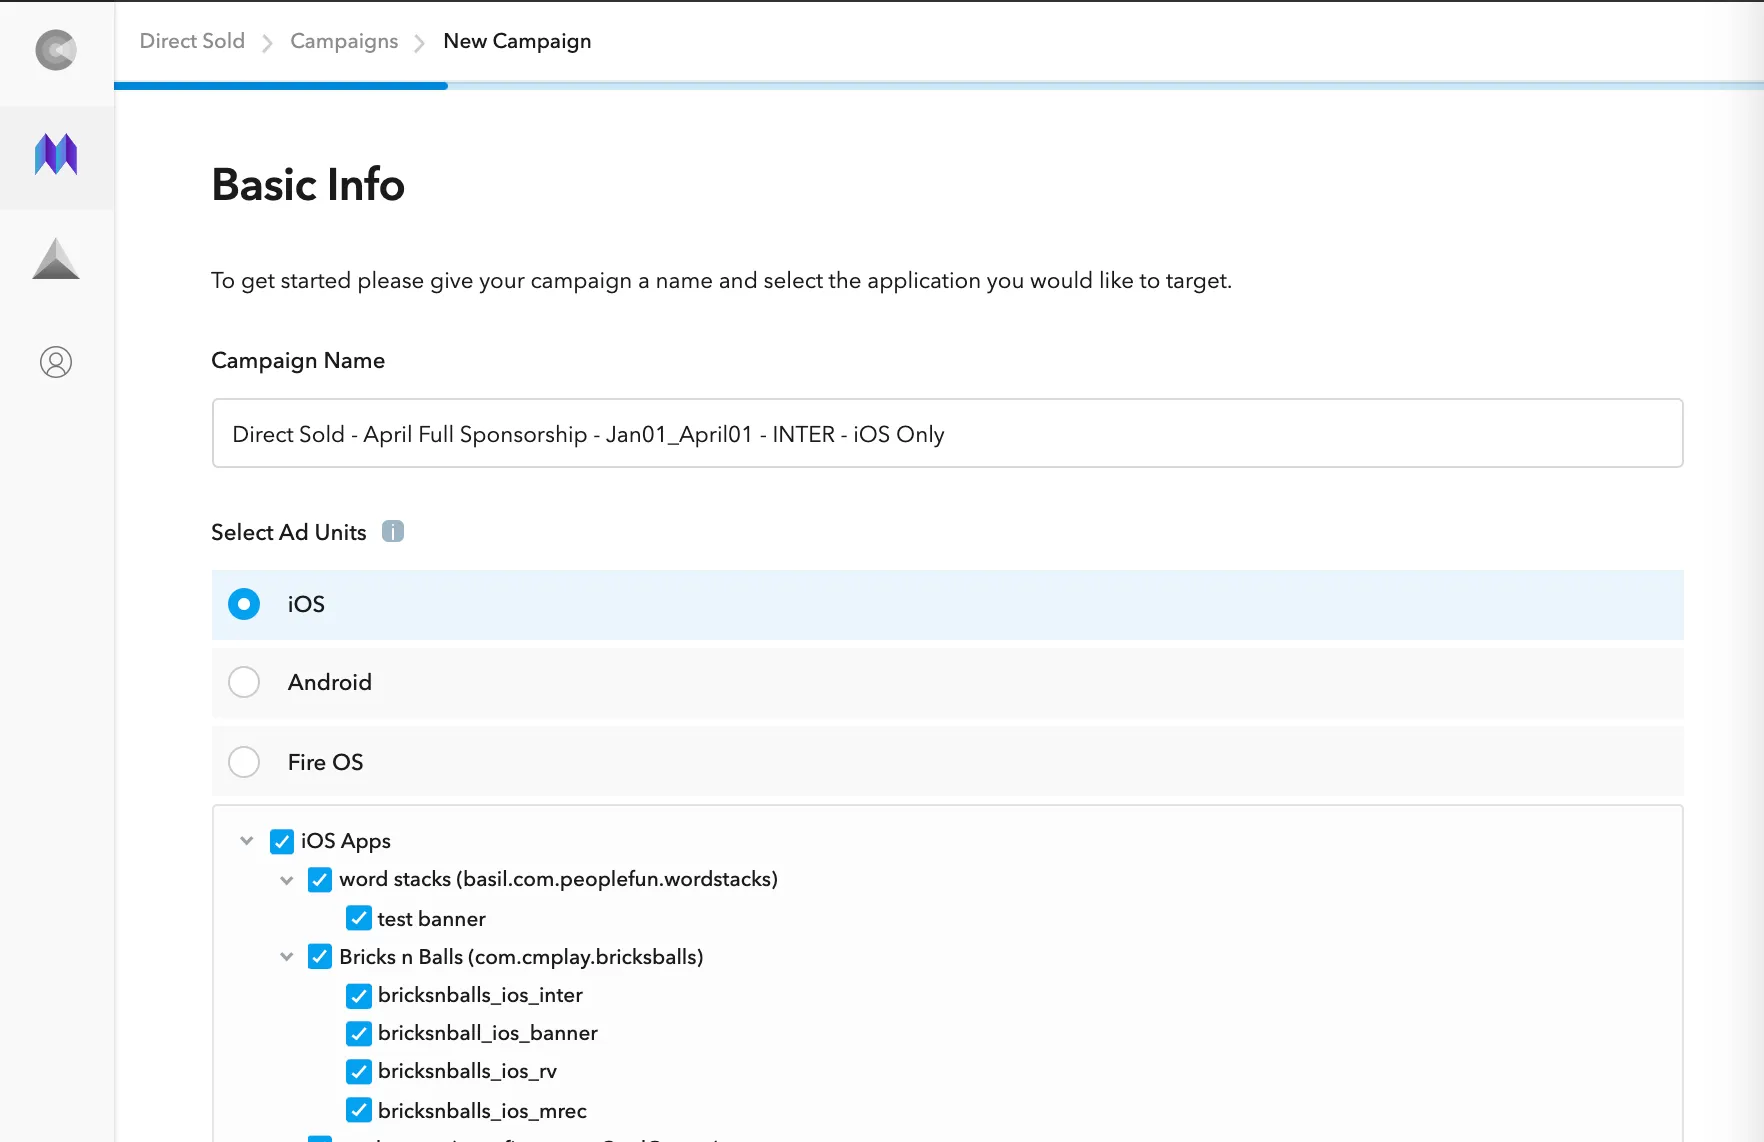
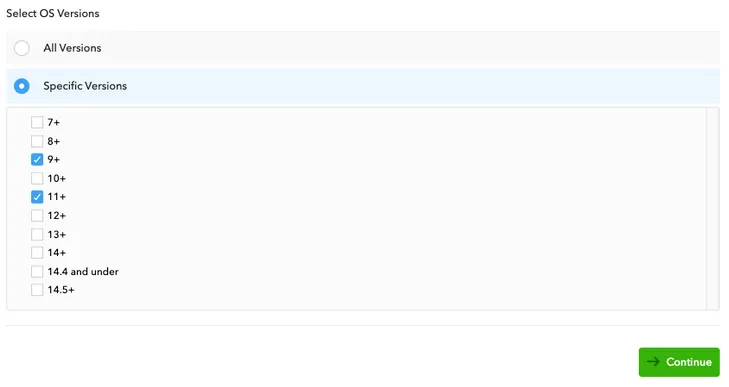
Select OS Version: To target specific OS versions, choose Specific Versions and select the version or versions from the checkbox list that appears. Otherwise, choose All Versions.
-
Click → Continue.
-
The New Campaign: Targeting page opens. Select your targeting criteria:
Country: You can choose either to target All Countries or you can choose Specific Countries and then choose, from the nested checkbox menu that appears, those regions, countries, cities, and DMAs in which you want to run your campaign.
Select Device Type: You can choose to target All Device Types or you can choose Specific Device Types and then choose from these options in the checkbox menu that appears: Phone and/or Tablet.
Select Connection Speed: You can choose to target All Connection Types or you can choose Specific Connection Types and then choose from these options in the checkbox menu that appears: Unknown, mobile, or wifi.
Carrier: You can choose to target All Carriers or you can choose Specific Carriers and then choose, from the nested checkbox menu that appears, the regions, countries, cities, or individual carriers of the devices on which you want to target your campaign.
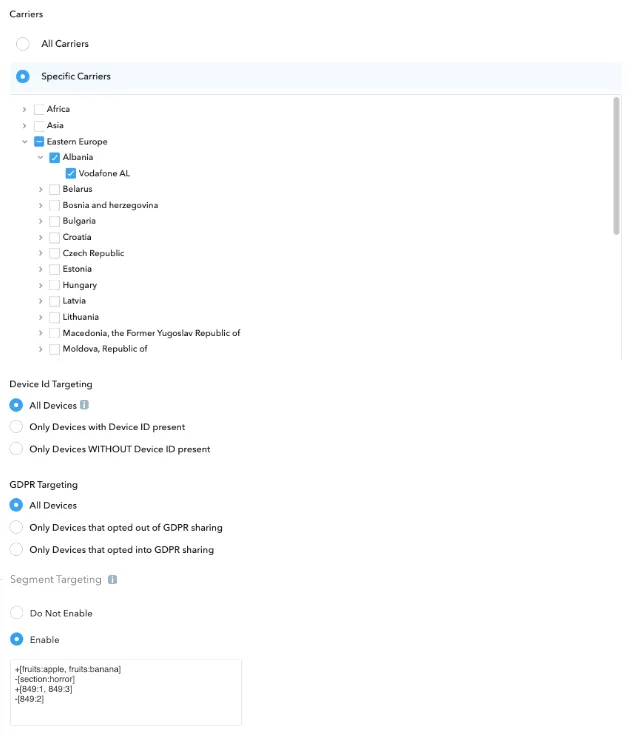
Device ID Targeting: You can choose to target All Devices, Only Devices with DeviceID present, or Only Devices without DeviceID present.
GDPR Targeting: You can choose to target All Devices, Only Devices that opted out of GDPR sharing, or Only Devices that opted into GDPR sharing.
Segment Targeting: AppLovin MAX SDK version 12.6.0 introduces a privacy-safe way to target waterfalls and Direct Sold campaigns. The APIs introduced in this version target by means of a generic key-value numeric pairing method. You are responsible for mapping the segment key and the applicable value(s) that represent the users you are targeting.
You can either choose not to target by segment (Do Not Enable) or you can choose to target by segment (Enable) and then type in a subset of those numeric mappings that your app passes to MAX, as
«segment»:«value»pairs that conform to the following rules.- You must put a plus (to indicate inclusion) or minus (to indicate exclusion) in front of each segment.
- To negatively target a property value, put a
-in front of the segment (for example,-849:2targets those devices for which the segment849does not have the value2). - To target a set of values for one segment, pass each value with the segment individually.
The following example matches direct sold campaigns for which the value of the
849segment is 1, 2, or 3:+849:1, +849:2, +849:3 - There is no method for targeting a range of values (other than targeting each value in the range individually, or negatively targeting each value outside the range individually).
- The comma in comma-separated values functions as an ∨ (or) operator.
A new line functions as an ∧ (and) operator. So, for example,
means [( §849≡1 ) ∨ ( §850≡2 )] ∧ [( §849≡1 ) ∨ ( §851≡3 )].+849:1,+850:2+849:1,+851:3
- The minimum segment value is
0; the maximum is32000. - Until later in 2025, old keyword-based (as opposed to segment-based) targeting continues to work for users on older app versions.
To support this, you may keep old keyword values alongside new segment values:
+fruit:apple,+123:1+veggie:kale,+124:7
-
Click → Continue.
-
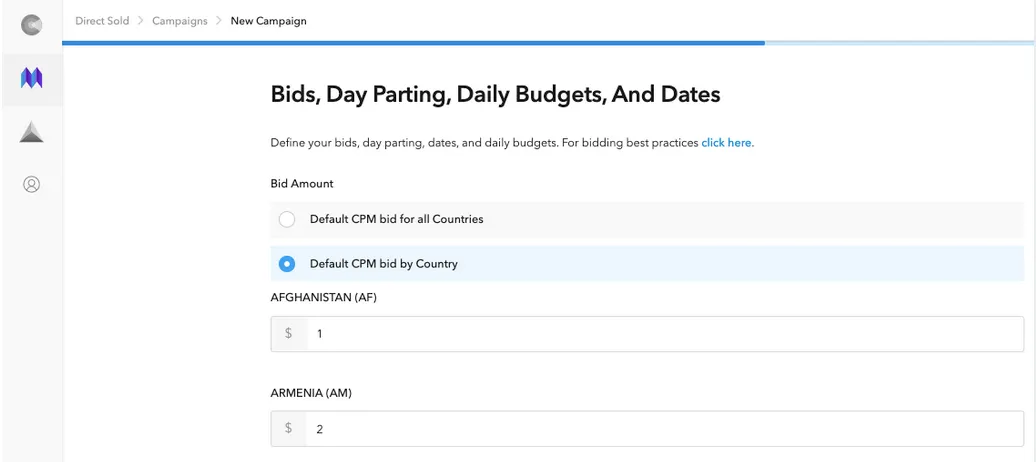
The New Campaign: Bids, Day Parting, Budgets, And Dates page opens. Define your bids/CPM target, day parting, dates, and budgets:
Bid Amount: You can either type in a Default CPM bid for all countries selected or you can choose Default CPM bid by Country and set CPM values for each country individually. The CPM value ranks your direct sold campaign against your waterfall demand. Your in-app bidders and mediated networks compete in a real-time auction.
Budget: Choose Unlimited if you do not have a serving goal. Choose Daily for the serving goal to be met each day. Choose Total for the serving goal to be met across the entirety of the campaign. If you select the Daily or Total budget types, choose either Impression target or Spend target (note: you cannot change the target type after the campaign start date). Then, for whichever you choose, either enter a default daily budget value to apply to all countries by choosing Single total budget for all countries selected and typing in a budget amount, or set individual budgets for for each country by choosing Total budget by country and typing in budgets for each country individually. Budget calculations are made daily based on the CPM value that you entered for each country.
If the budget is very low (i.e. less than 10,000) then unexpected behavior may occur (including over-delivery).
Budget Pacing (Daily budget type only): Choose As Soon As Possible if you want impressions to serve as soon as possible, without time-based throttling. Choose Spread Evenly if you want to allocate impressions evenly by hour throughout the entire campaign. Note that As Soon As Possible pacing is only available for the Daily budget type.
Start Date & End Date: Select the start and end date associated with your campaign from the drop-down calendars. All scheduling times are in UTC and apply based on the user’s device time zone. If you select today’s date as the start date, the campaign launches if the necessary conditions are met (such as valid assets, targeted ad units, and sufficient budget).
- End Date is required for “Spread Evenly” budget pacing.
- You cannot change the Start Date after that date.
Day Parting: Choose either to Serve all day or enable day/time parting by choosing Serve specific times and then choosing specific days and/or times from the checkbox menu that appears. All scheduling times are in UTC and apply based on the user’s device time zone.
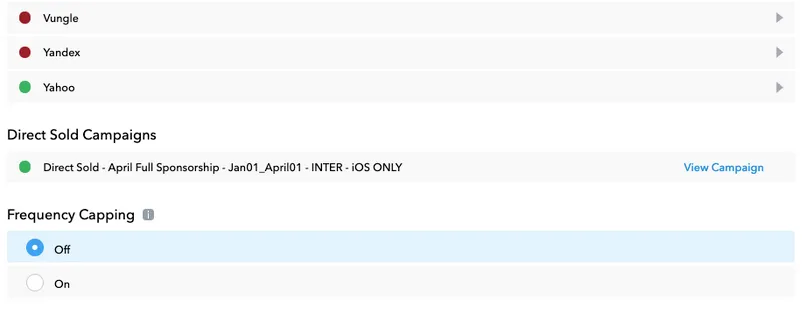
Frequency Capping: Disable frequency capping by choosing Off, or choose from one of the frequency capping options: Single Frequency Cap for all countries selected to target all countries with the same frequency cap, or Frequency Cap by Country to set frequency caps for each country individually. Then choose a capping method or methods from the drop-down selector that appears: either Session Based Capping or Time Based Capping. If you choose Session Based Capping then you also need to choose your cap value (the maximum number of times ads from this campaign will appear per session). If you choose Time Based Capping then you also need to choose your per-minute cap (the maximum number of ads from this campaign per unit time) and your daily cap (the total number of ads from this campaign per day).
-
Click ✓ Finish & Save.
Adding Creative Tags
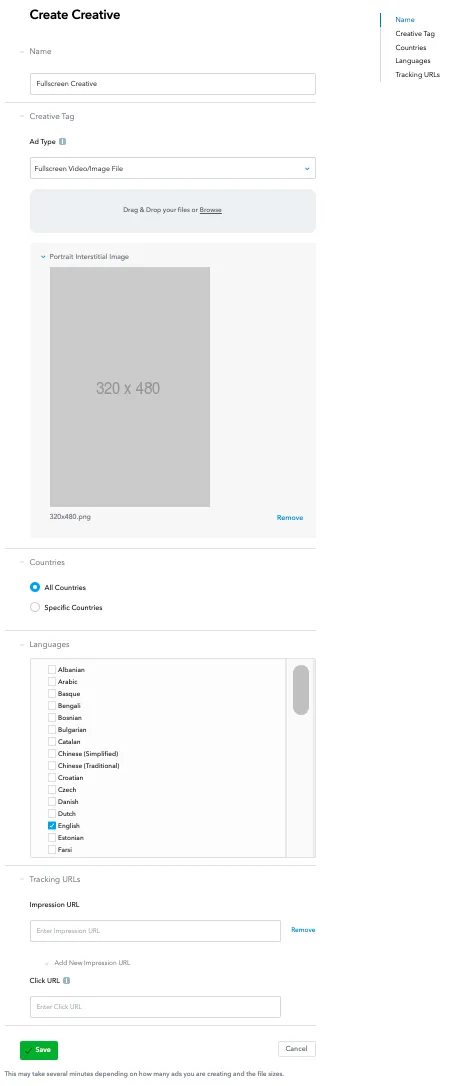
Direct sold campaigns support hosted images, HTML/MRAID tags, VAST tags, and native ad assets. Click + Create Ads to begin. The Create Creative page appears.
- Name:
- Enter the name you want to use for the creative.
- Creative Tag:
- Select an Ad Type from the drop down.
Then add the creative tag or upload a creative asset.
When you select your asset, MAX validates it to determine its type.
You may see a File Dimensions Not Supported message if MAX is unable to determine the correct variety of your asset.
Supported ad types include:
- VAST XML
- Select Fullscreen Interstitial, Fullscreen Rewarded, or Native Ad (MAX SDK v11.8.0+) from the Ad Format dropdown.
- Maximum size: 5MB
- HTML/MRAID
- Select Fullscreen Interstitial, Fullscreen Rewarded, Banner (for phone), Banner (for tablet), or MREC from the Ad Format dropdown.
- Maximum size: 5MB
- Fullscreen Video with Image File
- When you upload a video asset you must also upload an endcard image.
- For videos: maximum duration 60s, maximum size 1GB
- For images: maximum GIF length 30s, maximum size 1MB
- Fullscreen Image File
- The image should be in one of the following sizes:
- Landscape: 480×320, 1024×768, 512×320, 1138×640
- Portrait: 320×480, 768×1024, 320×512, 640×1138
- Maximum GIF length: 30s
- Maximum size: 1MB
- The image should be in one of the following sizes:
- Banner Image File (for phones)
- The image should be in 32:5 aspect ratio; minimum 320×50, maximum 1280×200
- Maximum GIF length: 30s
- Maximum size: 1MB
- Banner Image File (for tablets)
- The image should be in 364:45 aspect ratio; minimum 728×90, maximum 2912×360
- Maximum GIF length: 30s
- Maximum size: 1MB
- MREC Image File
- The image should be in 6:5 aspect ratio; minimum 300×250, maximum 1200×1000
- Maximum GIF length: 30s
- Maximum size: 1MB
- Native Ad
- Native Icon File
- The image should be in 1:1 aspect ratio; minimum 300×300, maximum 600×600
- Maximum size: 1MB
- Native Image File
- The image can be any size, excluding the following:
- 192×192, 320×480, 480×320, 320×512, 512×320, 640×1138, 1138×640, 768×1024, 1024×768
- Aspect ratio 1:1 — 300×300 to 600×600
- Aspect ratio 32:5 — 320×50 to 1280×200
- Aspect ratio 6:5 — 300×250 to 1200×1000
- Aspect ratio 364:45 — 728×90 to 2912×360
- The image can be any size, excluding the following:
- Maximum size: 3MB
- Maximum GIF length: 30s
- Native Icon File
- Title
- Up to 50 characters of text.
- Subline (Text)
- Up to 150 characters of text
- Button (CTA ext)
- Up to 15 characters of text
- VAST XML
- Countries:
- Choose whether you want to serve this creative set to All Countries, or choose Specific Countries and then choose specific countries in which you want to serve this set from the checkbox menu that appears.
- Languages:
- Choose whether you want to serve this creative set to All Languages, or choose Specific Languages and then choose a specific language or languages associated with your assets. Your ads will serve in the countries you selected earlier, but only on those devices that are configured to display content in one of the languages you select here.
- Tracking URLs:
- Optionally, add one or more impression URLs for tracking purposes.
For native ads and hosted video / image files, add a click tracking URL.
This table displays the macros that are supported in the tracking and click URL fields:
Name URL Macro Description Ad ID {AD_ID}The internal ID of the Ad that served. Name of Creative {AD_NAME}Name of the ad in AppDiscovery. Size of Creative {AD_SIZE}'inter','native','banner','mrec', or'leader'.Type of Creative {AD_TYPE}'graphic','video', or'reward'.Application ID {APP_ID}Hashed ID of the applications where ads are served. External Campaign ID {CAMPAIGN_ID}Hashed campaign ID. This value does not change when a campaign is renamed. Name of Campaign {CAMPAIGN_NAME}Name of the campaign in AppDiscovery. Country Code {CC}Two-letter country code of the user who was shown an ad. City {CITY}Name of the city based on Geo-IP lookup. Blank if unknown. Creative Set ID {CREATIVE_SET}Name of the Creative Set associated with the ad that served. Device Brand {DEVICE_BRAND}The brand of the user’s device. IP Address {DEVICE_IP}The user’s IP address. Populates with IPv4 or IPv6, depending on which the user has. Device Model {DEVICE_MODEL}The model name of the user’s device. Type of Device {DEVICE_TYPE}'phone','tablet', or'other', where'other'is iPodAppLovin Device ID* {DID}AppLovin internal device ID. Event ID {EVENT_ID}A unique ID of the the ad request that resulted in this ad showing. This ID is the same value for clicks and impressions for the same ad response Device Identifier* {IDFA}Fire OS only:{HADID}Apple IDFA or Google Advertising ID. Fire OS: lowercased then SHA1-hashed Android ID IP Address (IPv4) {IP}The user’s IP address (blank if user has IPv6) Locale {LOCALE}The primary locale of the user’s device. OS Version {OS_VERSION}The OS version of the user’s device. iTunes ID or Google Package Name {PACKAGE_NAME}iTunes ID or Google Package name of the app associated with the campaign. Placement ID {PLACEMENT_ID}Encrypted ID of the applications where ads are served. Needed for API Source bidding. SKA Campaign ID {SKA_CAMPAIGN_ID}The SKAdNetwork Campaign ID (1–100). Browser User Agent {USER_AGENT}The user agent of the user’s device. * required - Macros:
- This table displays the macros that are supported in tags (HTML, MRAID, or VAST tags):
Name Tag Macro Account ID (Publisher ID) %%ACCOUNT_KEY%%Advertising ID %%ADVERTISING_ID%%Advertising ID (IFA) %%ADVERTISING_ID_IFA%%Advertising ID (IFV) %%ADVERTISING_ID_IFV%%Ad Unit Format (Escaped) %%ADUNIT_FORMAT_ESC%%Ad Unit ID %%ADUNITID%%Ad Unit Name (Escaped) %%ADUNIT_NAME_ESC%%App Name (Escaped) %%APPNAME_ESC%%Bundle ID %%BUNDLE%%Cachebuster %%CACHEBUSTER%%Do Not Track %%DNT%%IP Address %%IPADDRESS%%IPv6 Address %%IPV6ADDRESS%%Latitude %%LATITUDE%%Longitude %%LONGITUDE%%Placement ID %%PLACEMENTID%%Request ID %%REQUESTID%%User Agent (Escaped) %%USERAGENT%%
Click ✔ Save to save your assets. This process may take several minutes depending on how many ads you are creating and the file sizes.
Ad Control Settings
Custom ad control settings are available for fullscreen creative types. By default, fullscreen creative types use account-default ad control settings for skip and close. You can override those settings for specific creatives in the Ad Control Settings section. This section is located at the bottom of the edit creative page.
After you select a fullscreen creative type, you can see and expand the section at the bottom of the page. The options for each format are as follows:
| Creative Type | Ad Control Settings Options |
|---|---|
| Fullscreen video interstitial | Custom delay for video skip button, custom delay for end card close button |
| Fullscreen HTML/MRAID Interstitial | Custom delay for image/MRAID close button |
| Fullscreen rewarded video | Custom delay for end card close button |
The screenshot below shows a fullscreen video interstitial example:
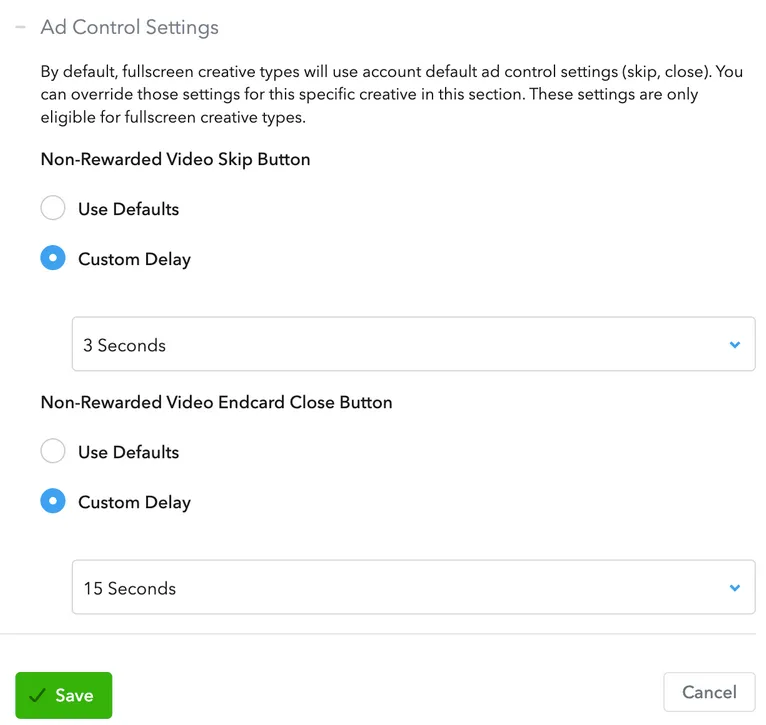
After you make your custom delay selections, click ✓ Save to apply your new settings to this creative.
Cloning Campaigns and Creatives
You can also clone campaigns and creatives instead of creating them from scratch. To clone a campaign, select + Clone Campaign from the Campaign Management section.

Then, select which campaign you want to clone and which order to add it to. Click ✓ Save to save your cloned campaign.
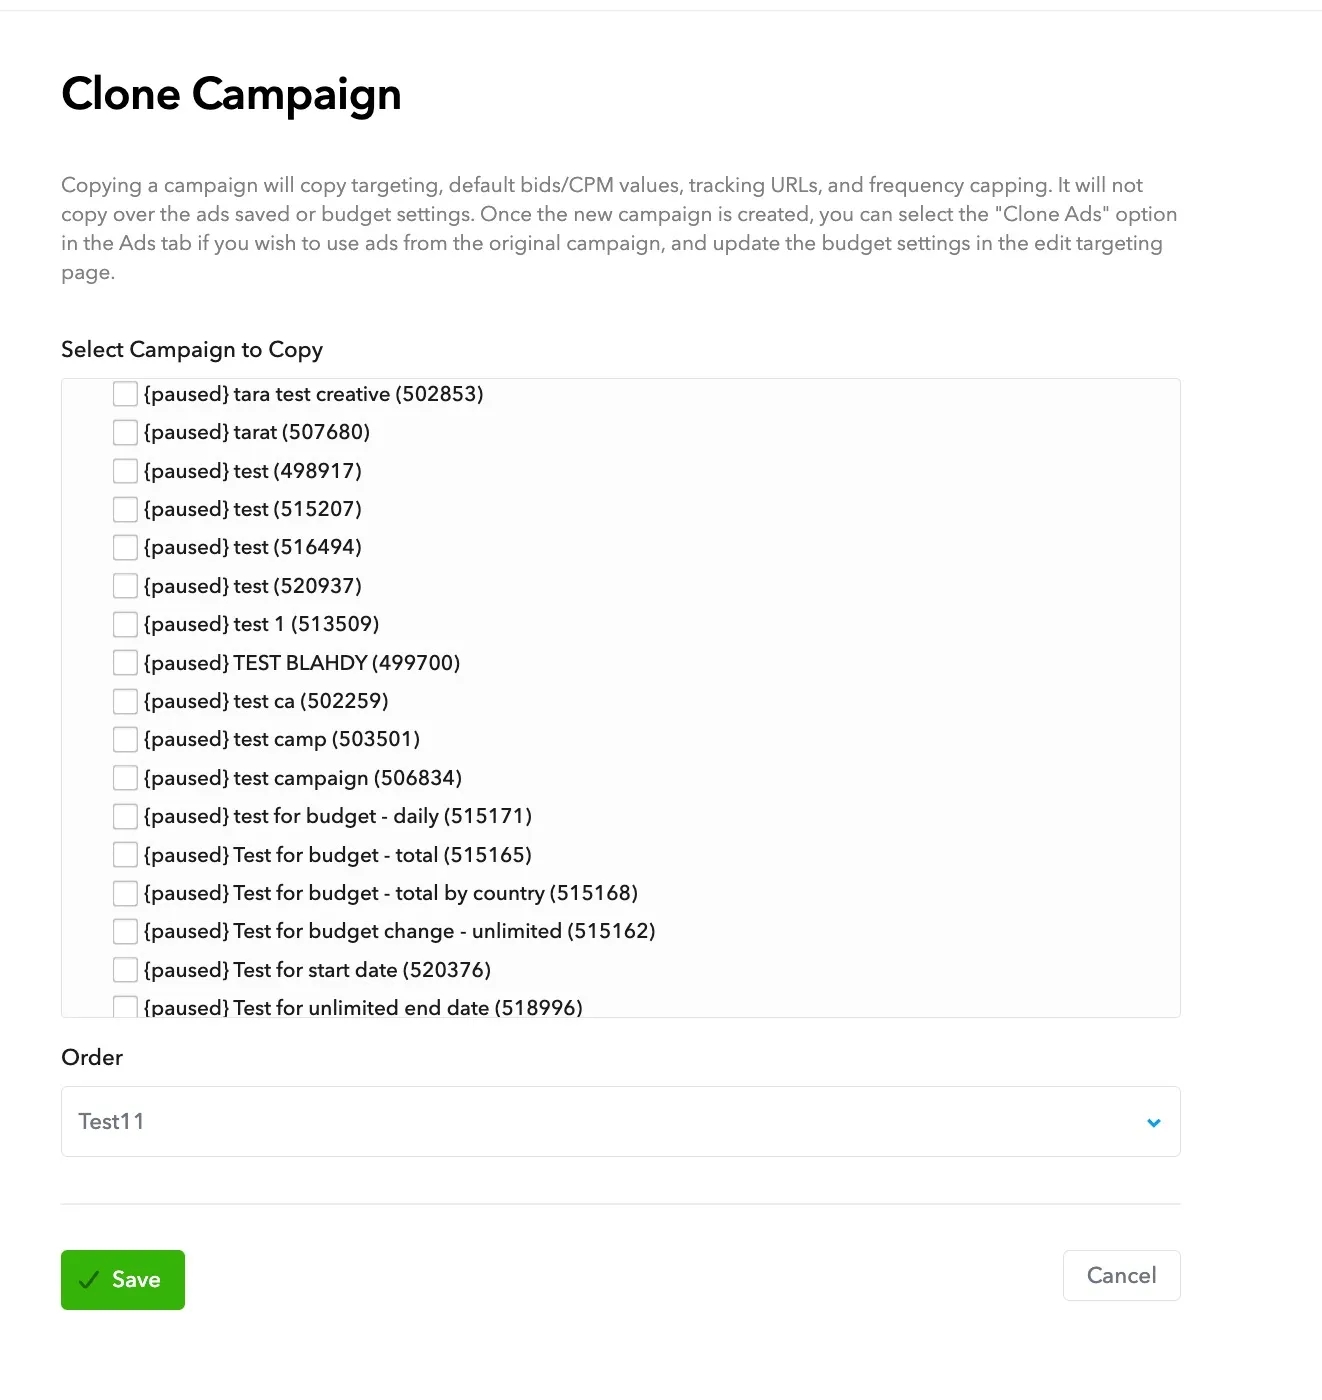
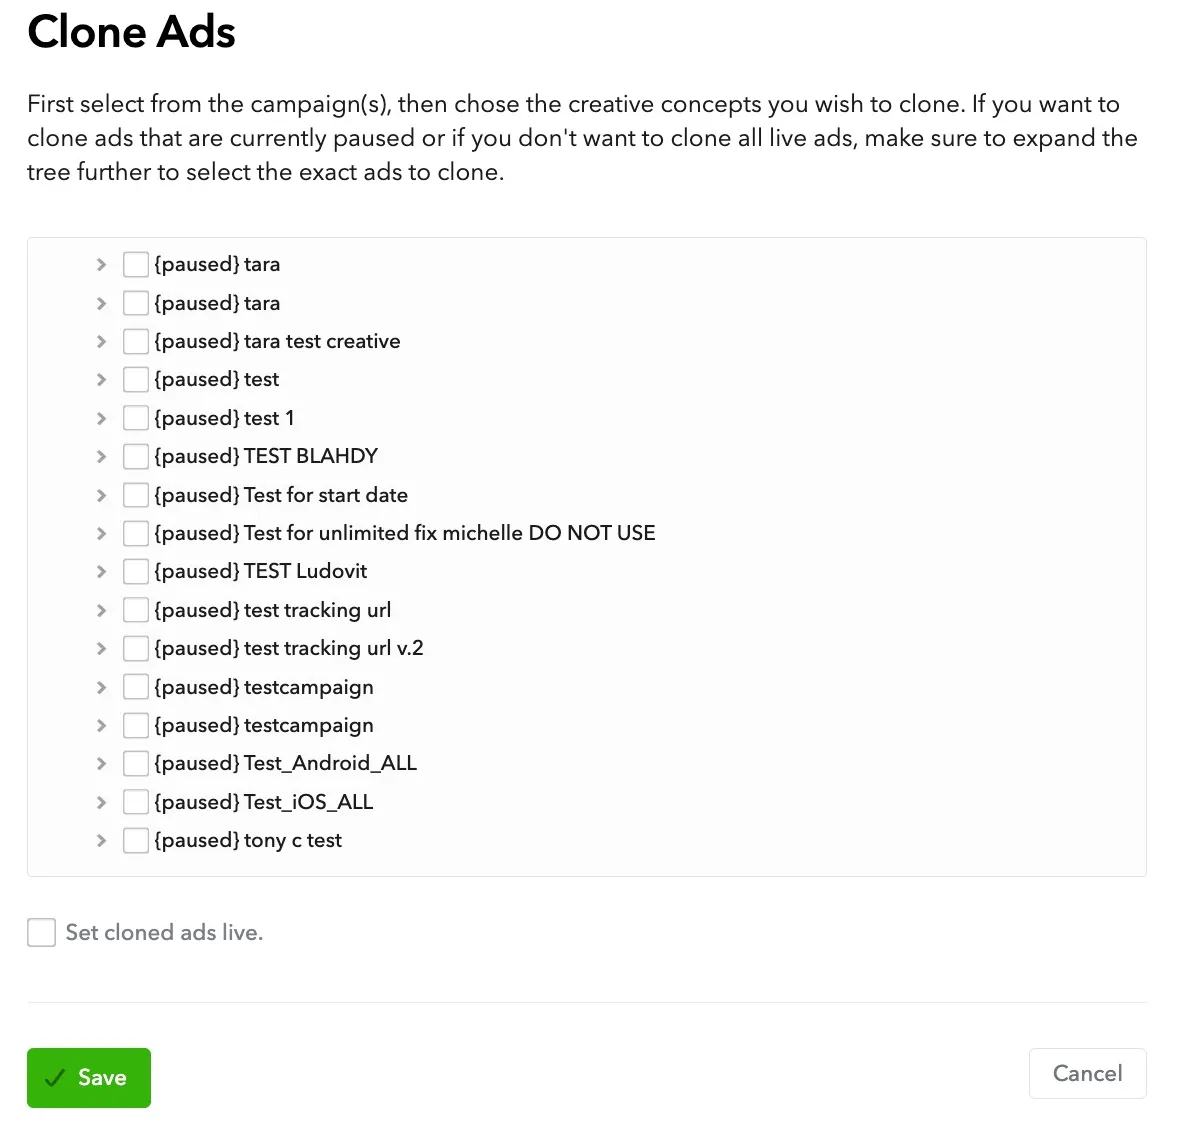
Note that when you copy a campaign this copies targeting, default bids/CPM values, tracking URLs, and frequency capping. It does not copy over the saved ads or the budget settings. To clone ads, navigate to the Ads tab within a campaign and select + Clone Ads.

Then, select which ads you would like to copy, and indicate whether those ads should be set live. Finally, click ✓ Save.
Additional Use Cases
- Promotional:
- Use the direct sold feature to run your promotional and cross promotional campaigns. Set up your campaign with the desired CPM price to determine the priority it serves in the unified auction.
- Cross-Promo:
- You can cross-promote apps that have the AppLovin SDK, but MAX does not track installs.
- Backfill:
- Use backfill campaigns to fill unsold inventory. Set up backfill by creating a direct sold line item and setting the CPM to $0.01. The campaign will only serve if no other advertising source can fill at $0.02 or higher.
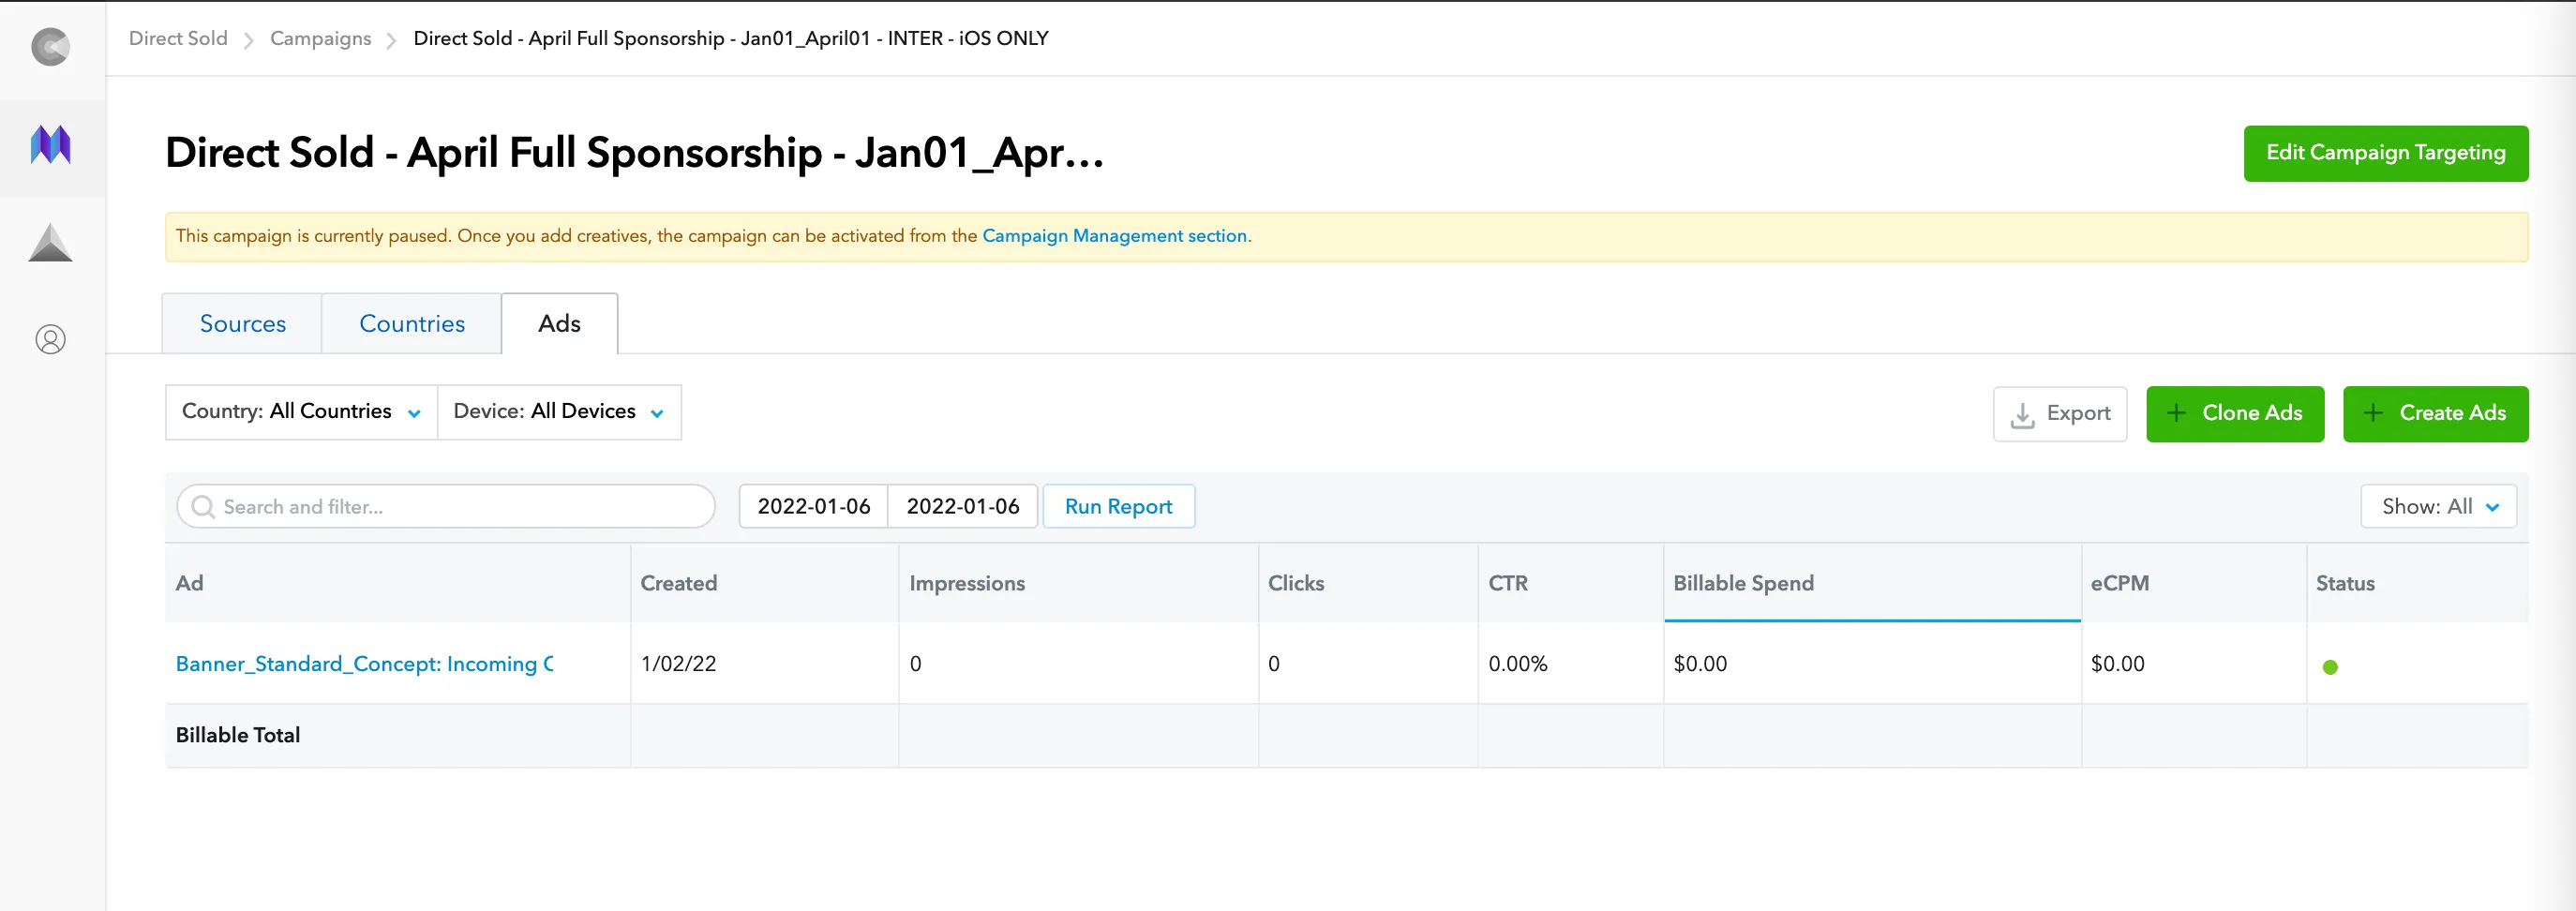
Monitoring Campaign Results
When your campaign is live, the Edit Ad Unit page updates to show the active campaigns.
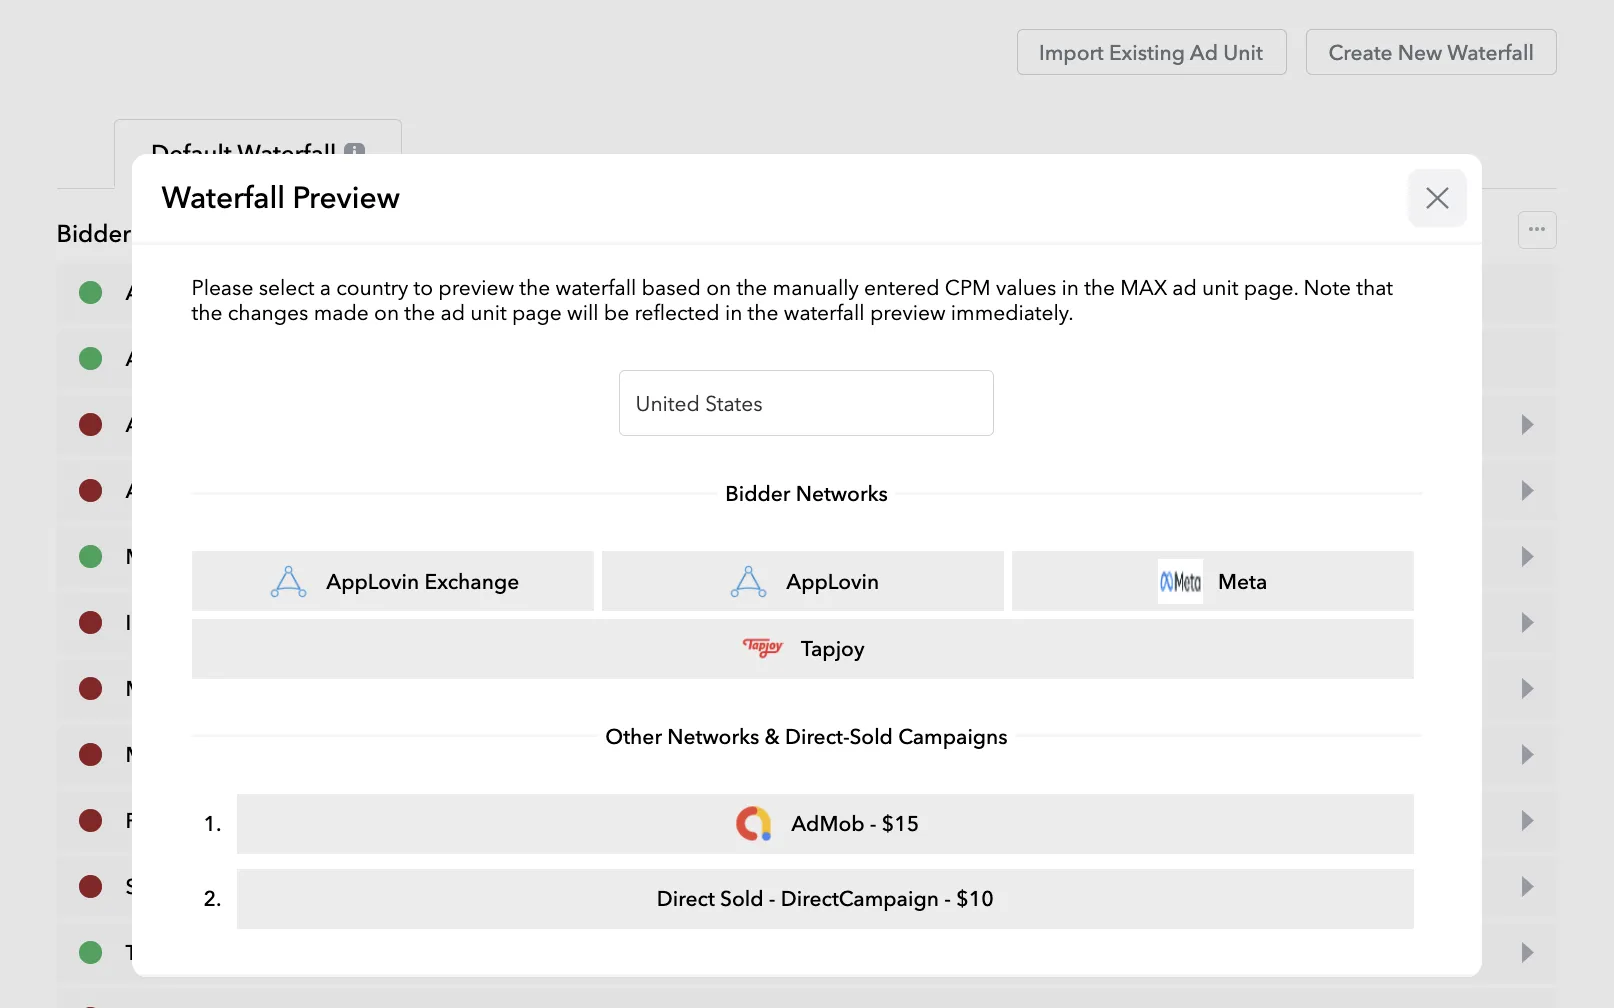
You can see how your direct sold campaigns rank against your waterfall demand sources in real-time. To do so, visit the Edit Ad Unit page’s Waterfall Preview section. Go to MAX > Mediation > Manage > Ad Units, select a specific ad unit, and in its Default Waterfall tab, select ⋯ > Preview Waterfall
There are three ways you can monitor campaign results:
- Advanced Reporting:
- Monitor the impact in requests, impressions, and revenue by selecting MAX > Mediation > Analyze > Advanced Reporting when your campaign is live. Campaign stats show in reports 20 minutes after you select Bidder Networks > Direct Sold Campaigns for the ad unit. You can also select specific campaigns under the Custom Network/Campaign Name dimension. This view allows you to see the delivery of your campaigns as a part of your overall stack.
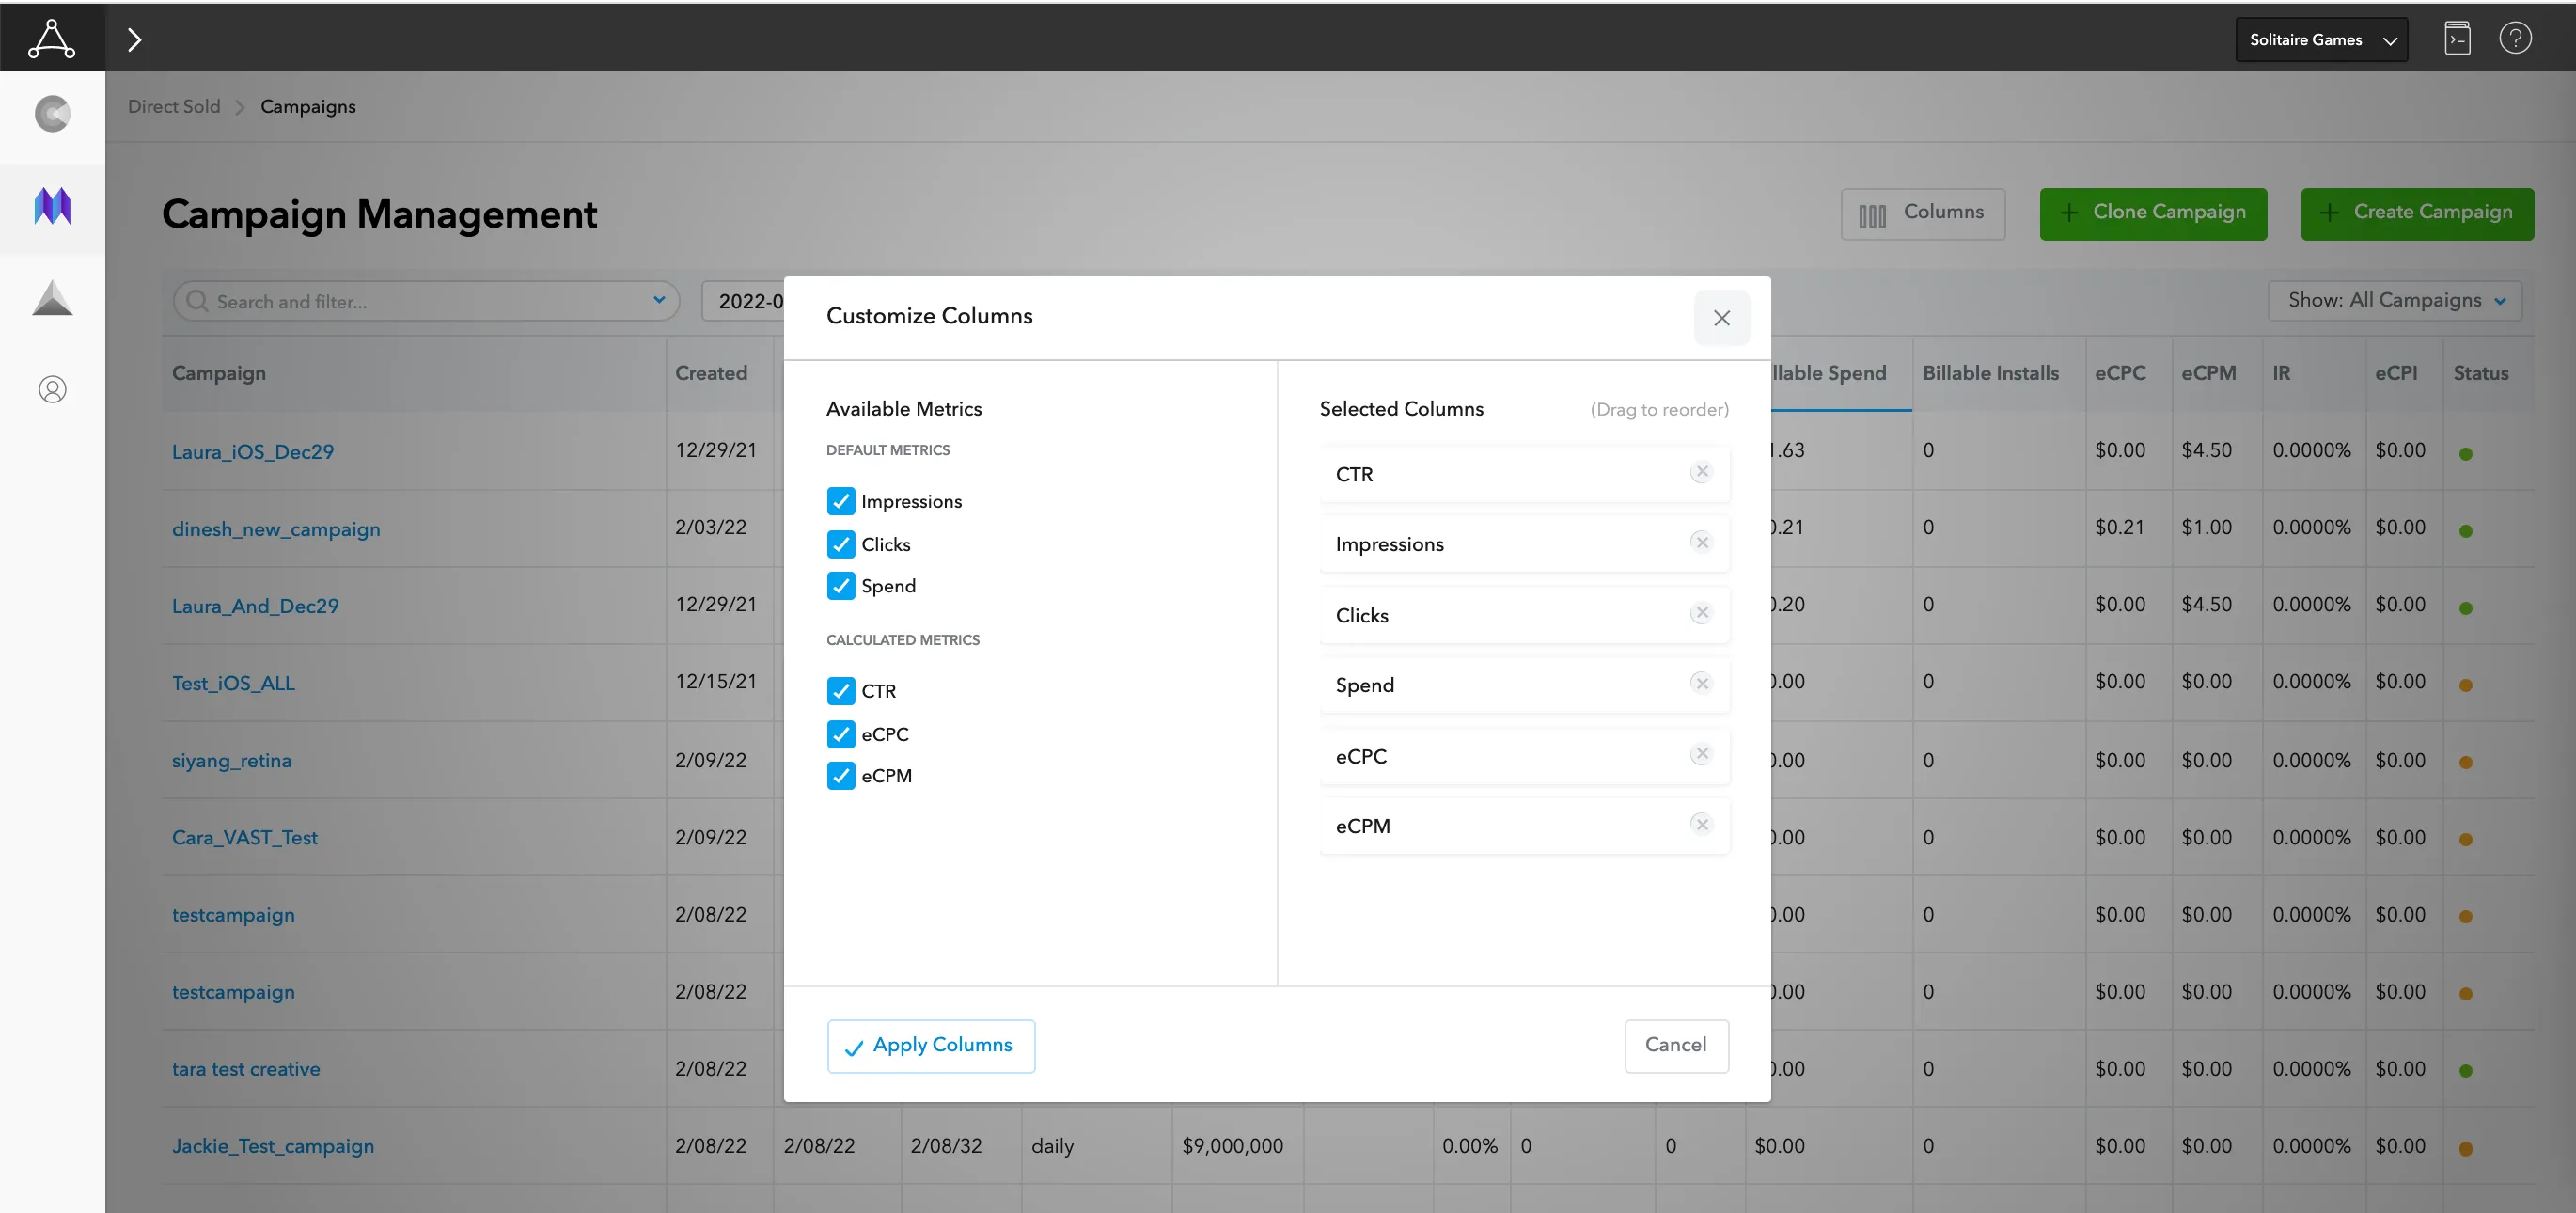
- Direct Sold Campaign Management Reporting:
- The Campaign Management dashboard allows you to see the budget, delivery of impressions, clicks, and additional optional data points for the dates you select. You can reorder or remove columns according to which metrics you want to view. To reach the campaign management dashboard, select MAX > Mediation > Manage > Direct Sold from your MAX dashboard.
- Direct Sold Reporting:
- Monitor the impact in requests, impressions, and revenue by selecting MAX > Mediation > Manage > Direct Sold from your MAX dashboard when your campaign is live. This report allows you to monitor campaign performance and to view campaign delivery by ad creative, application, etc.
MAX registers an attempt for a Direct Sold campaign if the traffic is eligible to serve. If the campaign has not met the budget or the frequency cap for that particular attempt, the ad server returns a valid response to fill that ad request. If you need to alter direct sold campaign frequency to deliver faster or in full, you can monitor the attempt count as a way of forecasting traffic volume.
Viewability
AppLovin integrates the Open Measurement (OM) SDK. This allows you to measure viewability for direct sold campaigns. AppLovin supports OM measurement for VAST SDK versions 11.0+, and for additional formats on SDK versions 11.3+. The formats supported on SDK 11.3+ are:
- Banner HTML/MRAID
- MREC HTML/MRAID
- Interstitial VAST XML and VAST tags
- Interstitial HTML/MRAID
- Rewarded VAST XML and VAST tags
Setting Up Direct Sold Viewability Campaigns
In order to measure viewability on direct sold campaigns, you must have a direct relationship with one of the supported viewability vendors. You can find a list of supported viewability vendors under Member Companies on the Open Measurement Working Group page. Work with your viewability vendor to set up the viewability tags discussed in this section.
Viewability tags are specific to each viewability vendor. However, in general you can set up viewability tags in the ways described below, depending on the ad format:
- Direct upload formats do not currently support JavaScript tags. You can use HTML as a workaround.
- For HTML tags, include your viewability vendors’ OMID/JavaScript tag in the HTML code. Work with your viewability vendor to obtain the tag and for guidance on where to insert it in your HTML.
- You can implement VAST XML video measurement tags by adding either an
<Extension>or<AdVerifications>node to your VAST tag. For each viewability vendor, work directly with your viewability vendor account representative on the specific way they recommend that you integrate the VAST<Extension>or<AdVerifications>node. For most verification vendors, the following instructions indicate how to implement the verification nodes:- For VAST versions pre-4.1, include an extension node below the VAST XML, with the
<AdVerification>node nested inside, as shown here:<Extension type="AdVerifications"><AdVerifications><Verification vendor="vendor name"><JavaScriptResource apiFramework="omid" browserOptional="true"><![CDATA[]]></JavaScriptResource><TrackingEvents><Tracking event="verificationNotExecuted"><![CDATA[]]></Tracking></TrackingEvents><VerificationParameters><![CDATA[“Vendor name”]]></VerificationParameters></Verification></AdVerifications></Extension> - For VAST 4.1, include the
<AdVerifications>node directly below the VAST XML, as shown here:<AdVerifications><Verification vendor="vendor name"><JavaScriptResource apiFramework="omid" browserOptional="true"><![CDATA[]]></JavaScriptResource><TrackingEvents><Tracking event="verificationNotExecuted"><![CDATA[]]></Tracking></TrackingEvents><VerificationParameters><![CDATA[“Vendor name”]]></VerificationParameters></Verification></AdVerifications>undefined</Extension>
- For VAST versions pre-4.1, include an extension node below the VAST XML, with the
Testing Your Viewability Tags
To test your viewability tags, set up your viewability direct sold campaigns and run test impressions in the MAX Demo App.
From there, you can work with your viewability vendor to confirm tracking is correct. They will instruct you to collect charles logs and track certain calls made by their tags, or to review reporting in their own viewability platform.
Best Practices
Do not use overlays (such as close buttons) that cover the ad and that subsequently cover the ad creative. This adversely affects your app’s in-view rates.
AppLovin strongly discourages the use of transparent overlays. If you use transparent overlays:
| platform | requirement |
|---|---|
| Android | Overlays must have alpha = 0 set for each overlay view. |
| iOS | Overlays must have hidden = YES set for each overlay view. |
Custom implementations such as custom ad wrappers and custom caching for banners may lead to lower in-view rates. AppLovin does not recommend that you use any custom implementations with viewability-measured direct sold campaigns.
All pixels in the ad container should be on the screen in their entirety. No pixels should be cropped out by content. No pixels should render beyond the edge of the device screen.
Reporting
You can receive viewability reporting on direct sold campaigns if you have a direct relationship with a third-party viewability vendor. In order to collect viewability measurement on your inventory, include the third-party measurement tags with the Direct Sold creatives by following the instructions above and those from your vendor.